Saturday, July 27, 2013

Mango Pickles


Oh, yes!  Mango pickles!  Sweet and spicy deliciousness.  I actually bought these mangoes for my morning smoothies, but since I bought very under ripe ones I was anxious to try pickling them.  I think I might try to pickle anything.  I may need help…


Mango Pickles


2 very under ripe mangoes

4 chilies (Thai would be best, but I used Serrano because I had them!)

¾ c white vinegar

¾ c seju or sake (rice wine of some sort)

¼ c cider vinegar

½ tsp salt

1 tbsp sugar

Juice of 1 lime

Peel and slice the mangoes in to whatever size you want them, but not too thick so they will have a uniform taste.  Slice the chilies.  Place them in your container; I used 2 one pint jars. 

On the stove, put in the remaining ingredients in a small sauce pan over medium-high heat.  Bring to just a boil, stirring to dissolve the sugar and salt.  Pull the pan off the heat and set aside for 5 minutes to cool.

Pour the brine over the mangoes and chilies, leaving headroom.  Allow to cool completely on the counter before putting the lids on and storing them in the refrigerator.  Let them sit for 1 day to develop flavors and should keep for a couple of weeks.

YUM!
PS: these turned out pretty darned warm, but oh so delicious! If you are only a moderate weenie like me, cut back by a pepper or two.  I find that a good ratio is one and a half Serrano peppers per pint.  If you don't like heat, these aren't for you!

Friday, July 19, 2013

Garden Veggies and Quinoa - Meal for 1 idea


As a student, employee, and *sigh* single lady, I often find myself cooking for just me.  Hey, it happens.  Most of my meals are extremely simple and not quite "recipe" necessary, but I thoroughly enjoy much of what I cook and need to remember my winning combinations.  This one made the cut and is so much better, in both taste and nutrition, and only a tiny bit of effort than that frozen junk . . .


Being that I am so rushed through out the week, running here and there, I usually take the time one day that I cook what ever grain that I will be using for several days and just add different toppings.  This time I opted for quinoa because when I was procrastinating on the studying I decided to clean out my cupboards.  My house is never so cleans as when I need to buckle down and study. I couldn't remember when I bought the quinoa and figured that I should use it up.  Besides, quinoa can go either savory or sweet if just toasted then cooked in water. 


There are so many great toppings for quinoa, veggies that need to be eaten soon, leftovers that I really didn't need to bring home but did anyway, cinnamon, sugar and butter.  I roast my quinoa on the stove top to add a nutty depth to it before cooking it and trust me it is worth the extra few minutes.  And I always have a block of hard cheese like Romano or Parmesan in the fridge because it lasts forever.

This time of year is fantastic for pulling my ripe stuffs out of my garden and chowing down on it.  Those Bloody Butcher tomatoes are AWESOME.  You should see my giant broccoli harvest.  Much of which will be steamed then frozen for later use, but I'm sure I'll get through most of it soon, plus there are several broccoli dishes and dips that I want to try.


Garden Veggies and Quinoa

1 tbsp. olive oil
1 small red onion thinly sliced, I used 2 because mine are extra small (see above)
5 medium coarsely chopped kale leaves, center vein removed
2 cloves crushed garlic
3/4 c cooked quinoa
3/4 c coarsely chopped broccoli, stems are where the fiber is . . . include them for crunch
salt and pepper to taste
1 medium tomato
1/4 grated FRESH Romano

Preheat a pan with the olive oil on medium heat.   Toss the onion into the oil and let it sauté until softened, and on the edge of browning, about 5 or so minutes.  Add the kale and garlic, coat evenly and sauté for a minute or two longer.  Add the quinoa and broccoli, then salt and pepper to taste.  allow this so cook for about 5 minutes, stirring occasionally.  While that is all cooking slice the tomato and set aside.

Dump that yumminess in a bowl. Garnish with the tomato and Romano.


No, my dinner isn't always so nicely presented.  And, yes, maybe I did add a bit more cheese after I took the picture. 


Monday, July 15, 2013

The Garden . . .

 
Is coming along nicely!
 

I've planted seven (7!) different tomato plants, because I cannot get enough of them.  I'll eat them morning, noon, and night.  In eggs, in pasta, in quiche, grilled with olive oil and salt, or just a plain old tomato salad with some herb and vinaigrette.  These I picked because of the name, "Bloody Butcher," and are the first to get ripe, even before the "Early Girl" (which are taking their own sweet time).

 
Cauliflower is just starting to come out and the broccoli has been being harvested for the last couple of weeks thanks to the early warm weather we had this year.  12 plants total, six were given to me, with a chuckle, by my (fantastic) mother when her boss said that someone had given him a bunch of cucumber plant.  Um, yeah, does that look like a cuke to you?  I hear that the only thing he grows in the way of edibles is mint for mojitos. 
 
I think I might put in mint next year. . .

 
I put in two types of onions, Walla Walla Sweets and Red Torpedo  My first time for growing onions ever, but I heard they were easy and they definitely are shaping up to be.  Thing is that I should have just stuck with the one pack, not realizing that each pack contained about 100 onion starts.  Nope, not kidding, so I planted half and gave the other half away to a fellow gardening friend.  The red ones are already saying that they are done, but they are MUCH tinier than they should be.  The Sweet are going strong.


Tomatillos have taken over!  This plant is over 5 feet high and about that big around.  It lifted its cage right out of the ground so it is now tied up to the fence. And a rhododendron. And the cage. Ridiculousness!

 
For herbs, I have my faves in.  Cilantro, dill, chives, basil, sage (goes well with the onions!).  DROOL!

 
Of the five different peppers, this one is Czech Black, but there is Thai, Hungarian, Jalapeno and something else that will be a surprise because the tag has gone missing!  Possibly a banana pepper?
 
Just starting to get big are the eggplants, butternut squash, and pole beans.  Soon, I'll seed more peas for late summer and the next round of herbs. Can't wait!

I would say that was it but the peas dies very early after yielding a whole five pods (too little water?), the zucchini seems to be rotting on the ground (too much water maybe?), and the squirrels ate the strawberries.  Who knew?  I now try to glare them down, but I have stuff to do and can't just sit there and protect the garden . . . but that would beat working!

Saturday, July 13, 2013

Carrot Stick Pickles


Let the pickling continue!


I made and served these at Christmas a few years ago and they were an amazing success.  I don't think the olives or jarred pickles were touched at all, no one could get enough of the carrots.  I was happy that I had made a large recipe of them as I had to refill their spot on the relish tray twice.


Since then I have made a few additions to the recipe to give it a bit of a kick, but the original recipe is fantastic and I still make it often.  In my toiling, I have made them killer hot, which had to be given away, made them too sweet, and too bland, but this is the version I like best!


I stumbled across the recipe on Smitten Kitchen’s blog, which I am addicted to and make her recipes quite often.  That Christmas was full of her recipes, and everything was great!


Carrot Pickles

Original: http://smittenkitchen.com/blog/2008/01/pickled-carrot-sticks/

3 large carrots (I use Italian, which are HUGE)

5 cloves garlic

1 ¼ c water

1 ½ c white vinegar

¼ c sugar

2 tsp salt

1 tbsp dill seed

1 tbsp dill weed

½ tsp red pepper flakes


Peel and cut the carrots into sticks, not too thick!  Place them in the heat proof container that you are storing them in, and again even though I used 3 pint canning jars, don’t be fooled in to thinking that I truly canned these, they are refrigerator pickles!  

Peel and slightly crush the garlic cloves.

In a small sauce pan, add the garlic and the rest of the ingredients, heat to a boil, stirring to ensure the sugar and salt dissolve.  Reduce heat to low and simmer for about 3 minutes.  If using multiple containers, spoon out and divide the garlic between them.  Pour the brine over the carrots, leaving headroom, and allow to cool completely before keeping them in the refrigerator.  Hands off for at least 3 days. 

Try not to eat them all in one sitting!

Saturday, July 6, 2013

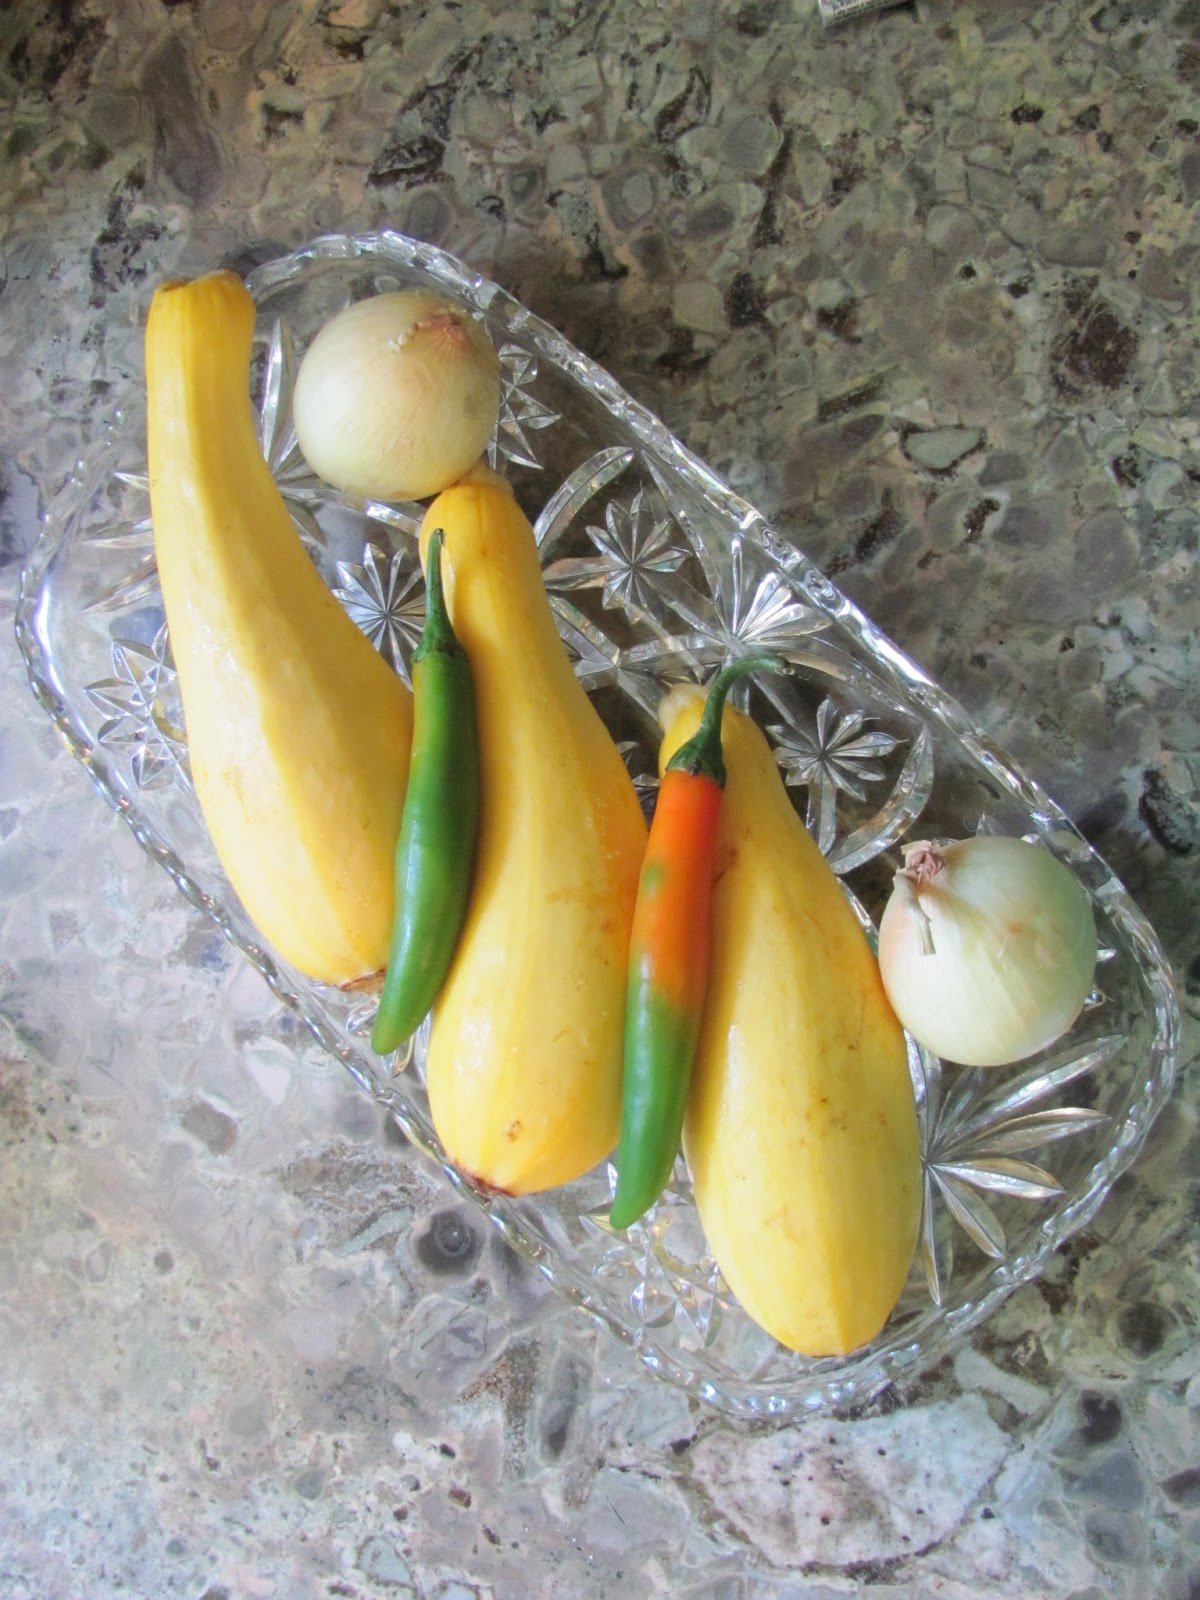
Yellow Summer Squash Pickles


I am having a love affair with pickles lately.  I pickle almost everything to make them tangy-sweet, spicy, garlicky, dill-y.  Heaven!  I really cannot wait until my vegetable garden is ready to be harvested and, well, pickled.


When I kept running across various versions of this recipe, I knew I MUST make them!  I decided to tweek it to my tastes.  All of the recipes that I found called for either bell or sweet peppers, but that is for the timid, or those who refuse to head back to the produce market to get them.  As I was making the brine, it was like honey and will nicely complement the heat from the chilies. 


And I wasn't disappointed!  This brine with the Serranos are a winning combo and I pretty much sat down with the jar and a fork and had a very happy snack!

Yellow Summer Squash Pickles

4 medium/large yellow summer squash

2 small yellow onions

3 Serrano peppers

¼ c sea salt

1 tray ice cubes (I forewarn on this because inevitably I have no ice when a recipe calls for it!)

1 ½ c cider vinegar

1 c white vinegar

½ c water

1 c sugar

1 tbsp Ground mustard

Peel and thinly slice the squash and onions.  Thinly slice the peppers.  I do this with the slicing blade on my food processor, keeps the tears down and the hot pepper juices off of the fingers.  Put these in a LARGE bowl with the salt and lightly toss.  Dump on the ice cubes, cover the veggies with water and set aside for 30 minutes.

Drain and rinse the veggie, then set aside to fully drain while you make the brine.  In a medium sauce pan combine the vinegars, water, sugar and mustard.  Bring to a boil over medium heat, stirring occasionally so the sugar dissolves.  When the brine begins to boil, remove from heat and set aside for 5 minutes, allowing it to cool somewhat. 

Place the veggies in a heat proof container that you wish to store them in.  I used 3 pint jars; don’t be afraid to shove them full.  Also, don’t be fooled in to thinking that I truly canned these, they are refrigerator pickles!  Pour the brine over them, leaving headroom, and allow to cool completely before storing them in the fridge.  Pickles take a few days to develop flavor, so try to keep your hands off of them for 3 to 5 days. 

Enjoy!

Friday, July 5, 2013

Pickle Test

Yeah, I'm a little late to the blogging game, but I need a place to put all the recipes that I love make and love to modify without having to print them out or keep them on my hard drive. 

I'll post links where applicable and try not to step on toes, as I have no idea where I have gotten some of these recipes as I go through my stack of print outs . . .

So this is my test start.